I’ve continued working on the rear suspension, and have a working mock-up.
I had to go through a number of different bracket patterns as I narrowed in on what was going to work, but using HDPE sheet makes mocking up various designs very quick and simple. It drills, reams, cuts and shapes very easily. It’s stronger than wood of the same dimension and won’t split like wood. It’s very stiff and cheap enough that I don’t mess with cardboard patterns.
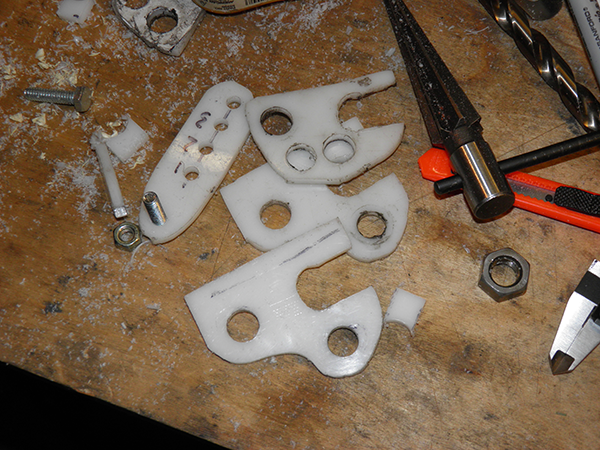
I realized that the rear linkage was going to have to deal with both compression and tension stresses, so I thought it would be smart to use a production suspension linkage to get the strength I needed. I first ordered an RM250 linkage fork, but it was way too long. (That’s one of the problems of ordering off E-bay; you often have no sense of scale.)
My second attempt, a linkage from a Yamaha XT350, was a much better choice.

Once I had the setup working, I measured the suspension ratio.
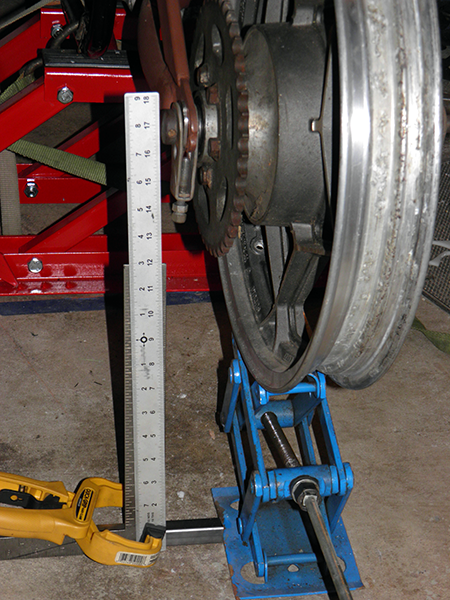
This setup allowed me to raise the rear wheel a quarter inch at a time, then measure the distance the shock compressed.
I have a nice progressive rate linkage that rises from about 2:1 at the start of travel to approximately 3.3:1 before it bottoms out. The current set-up provides a little over 2.5″ total rear wheel travel, but that’s because the crappy XR100 damper’s range of travel is only a little over an inch.
The shock presents a real problem. It fits the space perfectly, but functionally it’s almost totally unsuitable. The damping is, as I’ve said, nearly non-existent. Shock preload is not adjustable. It has a clevis on one end, while rubber-grommeted eyes on both ends would suit my brackets better. What fits best doesn’t always work best. In fact, I’ve spent hours surfing Ebay listings for various shocks, and there’s a problem with all of them. Anything that physically fits the space I have is either non-adjustable, non-rebuildable, worn out, rusty, stamped steel OE crap, or no-name Asian cheap-o aftermarket crap, or is name-brand stuff that costs a whole lot more than this project warrants. Furthermore, I have very little idea what sort of damping and spring rates this bike will actually require once I start riding it.
A big part of the problem is that the shock and the mounting brackets are interdependent. I have to tailor the rear linkage to the length and position of the shock: the suspension rate only rises properly if the linkage mounting bolt is positioned to be directly over the rear damper eye when the shock is fully compressed. So I continue debating whether to keep working with the shock I have now, even though I know I won’t want it in the end, or do I spend a bucket of money now on one component for a project that is otherwise made up entirely of cheaply-acquired junk? Damper choice has so much effect on the handling and ride of a motorcycle that I don’t want intentionally settle for something crappy…but given the premise of this project and the other components I’ve used, ending up with crap overall might already be the inevitable result.
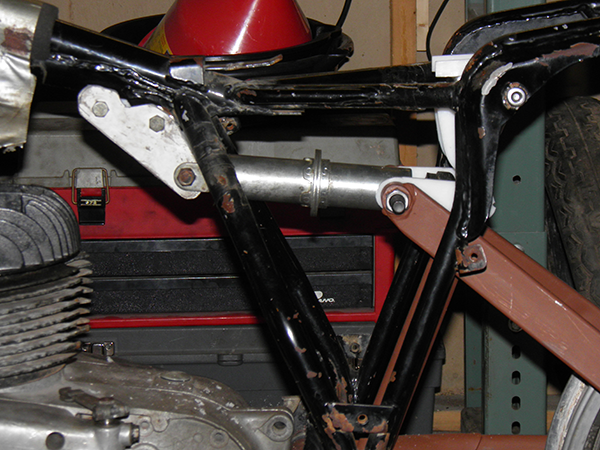
To add to the uncertainty, I haven’t worked out exactly how to attach the upper mounting bracket to the frame. As you can see in the photo below, I simply designed my pattern bracket plates to slip over an existing frame tube and then fit through a hollow steel tube fitted between two bolts screwed into the original shock mounts. Not exactly a practical final arrangement.
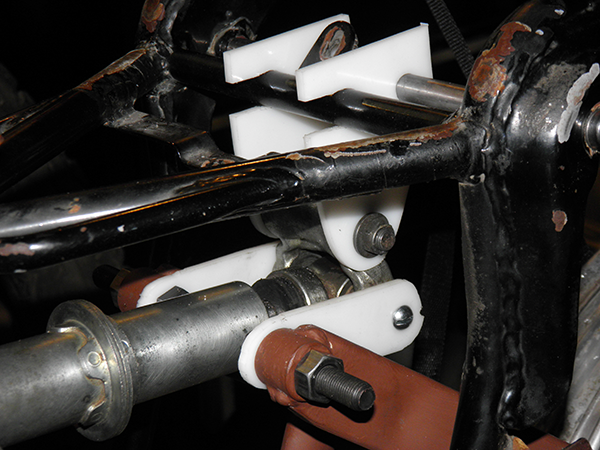
(Ignore the super-long bolt in the swingarm…I borrowed my engine mounting bolts for the mock-up)
So, I guess I will keep surfing Ebay for a more permanent solution while in the meantime continuing to work with what I have on the cheap. Hopefully I can proceed in such a way as to leave my options open to change tacks without too much additional re-work when a better solution presents itself down the line. I am trying hard to conserve money and effort by thinking things through enough to avoide heading down ill-considered blind alleys.
Speaking of which, anybody need a monster-sized ZX750R shock or a ’96 RM125 shock linkage?