I’ll review a bit: My plan all along was to NOT modify the frame any more than absolutely necessary. Keeping with that tack, I planned to lay up a fiberglass seat pan and tail section to fit the contours of my frame. The frustrating part of this was that with the monoshock setup, the kinked tubes and big shock gussets were now utterly vestigial. Also, the left-hand shock was originally offset to clear the chain, so the shock mounts where asymmetrical as well.
I wanted something compact, with a bit of a butt-stop, but I didn’t want one of those thinly padded racing seats. I want the bike to look like a ’70s factory street bike, and I want it to be big and comfy enough to actually ride. So, as I mentioned in an earlier post, I went out on Ebay and got a seat from a Honda NU50 Urban Express. When I received it, it was the perfect dimensions, exactly what I was wanting. Unfortunately, this did nothing to resolve the problem of my snaky, bumpy frame. I’d have to mount the seat much higher than I wanted or cut into the plastic seat pan. In short, the whole arrangement was going to look half-assed. Playing around in Photoshop (as shown earlier) confirmed that the only really solution would be cutting the frame after all. So, even though cutting the seat tubes seems to be where every project bike goes to the dogs, I screwed up my courage and cut off the back of the frame.
And then immediately freaked out. Fortunately, having access to your own metal lathe is about the coolest thing in the universe. The Bultaco frame tubes are metric: 20 mm dia. x 1.5 mm wall thickness. In inches, that works out to .787″ OD and 0.669″ ID. At first I thought I would have to machine a mating plug, but after a bit of calculating and sketching, I decided that 3/4″ x 0.120″ wall DOM tubing could be machined down to fit directly inside and still have plenty of strength.
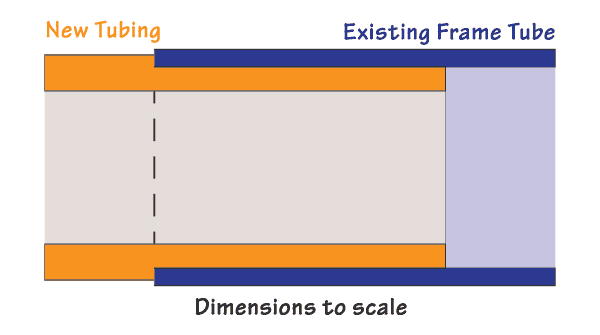
It took me three test pieces to get the exact diameter that provides a snug, slop-free slip fit inside the frame tubes, but I was then able to make up two tube extensions that fit perfectly.

They can be welded around the circumference of the joint and ground down. The OD of the new pieces is just slightly less than the frame, so the joint won’t be completely invisible, but that’s a rather minor aesthetic concession.
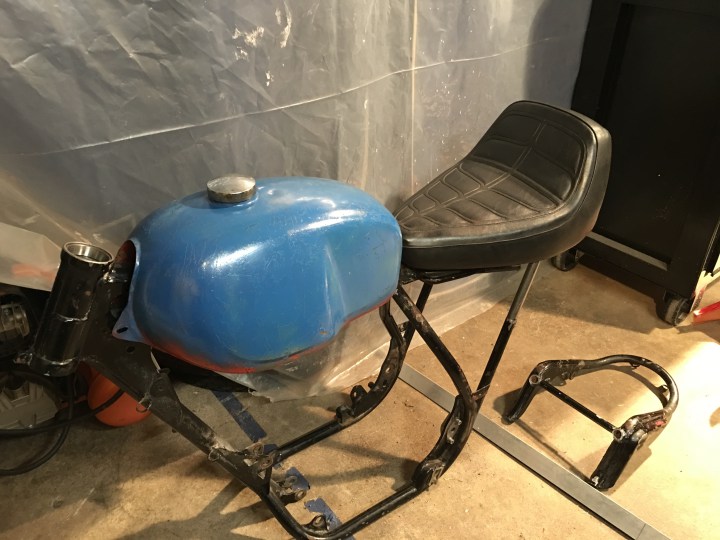
There’s a lot more to do to finish the rear of the frame, but I was very happy with the result when I was able to put the seat in its proper place for the first time.
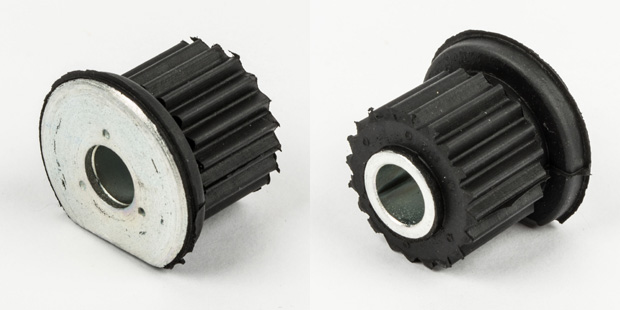
And, flush with good feelings from the progress I’d made, I’ve embraced a bit more scope creep. I’ve decided to integrate these rubber engine mounts from a Suzuki triple into my latest sketch for rear engine mounts.